HOW TO MAKE AN AWESOME PLLOP
Pllop can have up to ten pages. Just use as many pages as you need. Unused pages will not be shown to viewers of your pllop.
Need more pages? Make another pllop!
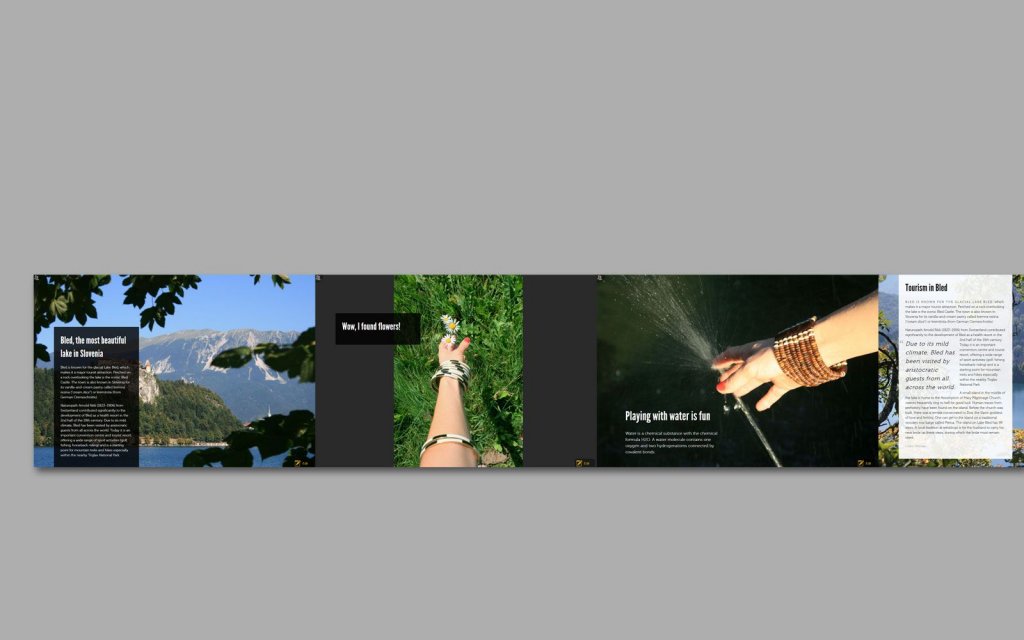
A great photo is the foundation of a great pllop
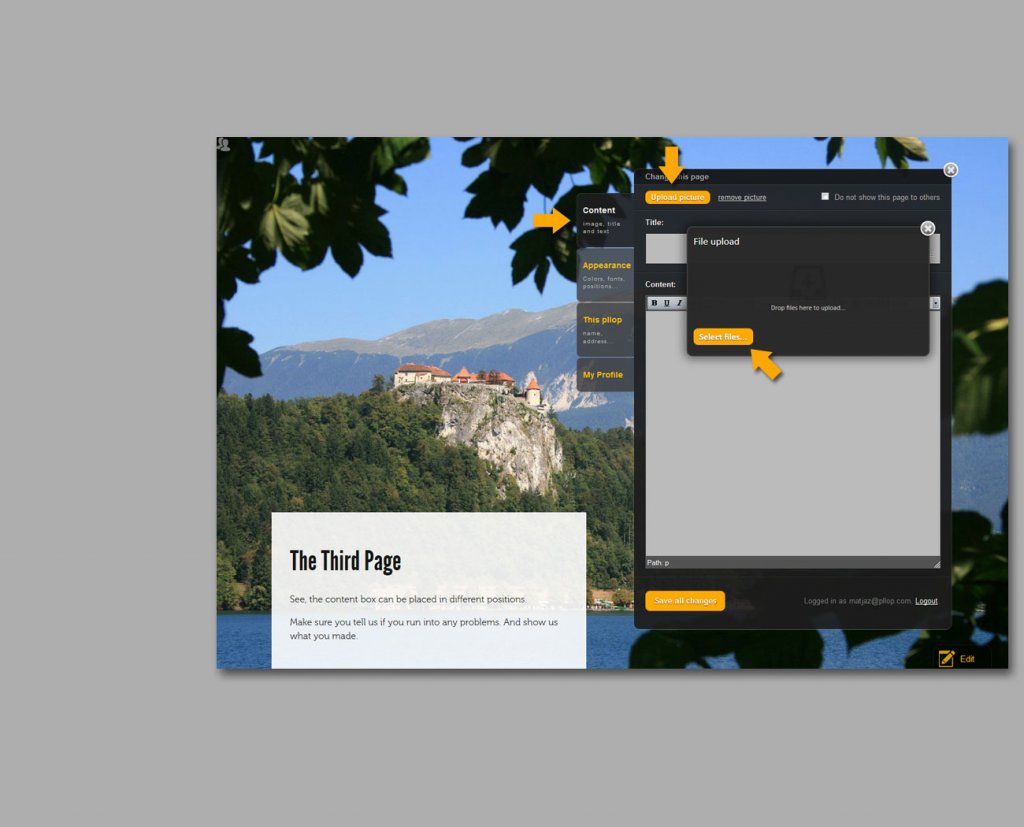
To start creating a page just click on the edit button in the bottom right corner. Once the editing tool is open, click on the tab »Content« and upload a photo. Your photo should be at least 1000px wide. Around 1600px is perfect. Bigger photos will be resized automatically to 1600px.
The right photo in the right place
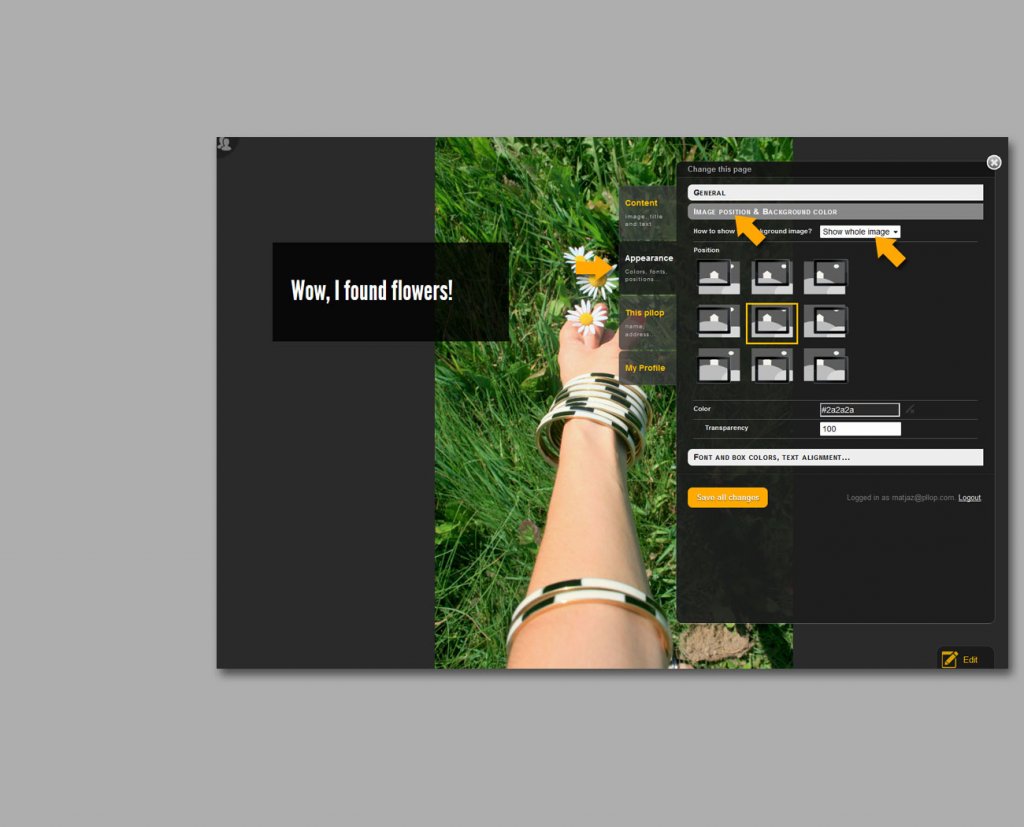
If you upload a vertically oriented photo it will probably not look good by default. Best is to use the option to show the whole image instead of stretching the image to fill the whole page. To do that click on the tab »Appearance« and then choose »Image position & Background color«. There you select the “Show whole image” option.
Here you can also set the position of your photo and the color of the background. Background is shown when photo doesn’t cover the whole page. These options are useful for all photos, not just for vertically oriented ones.
No photo? No problem!
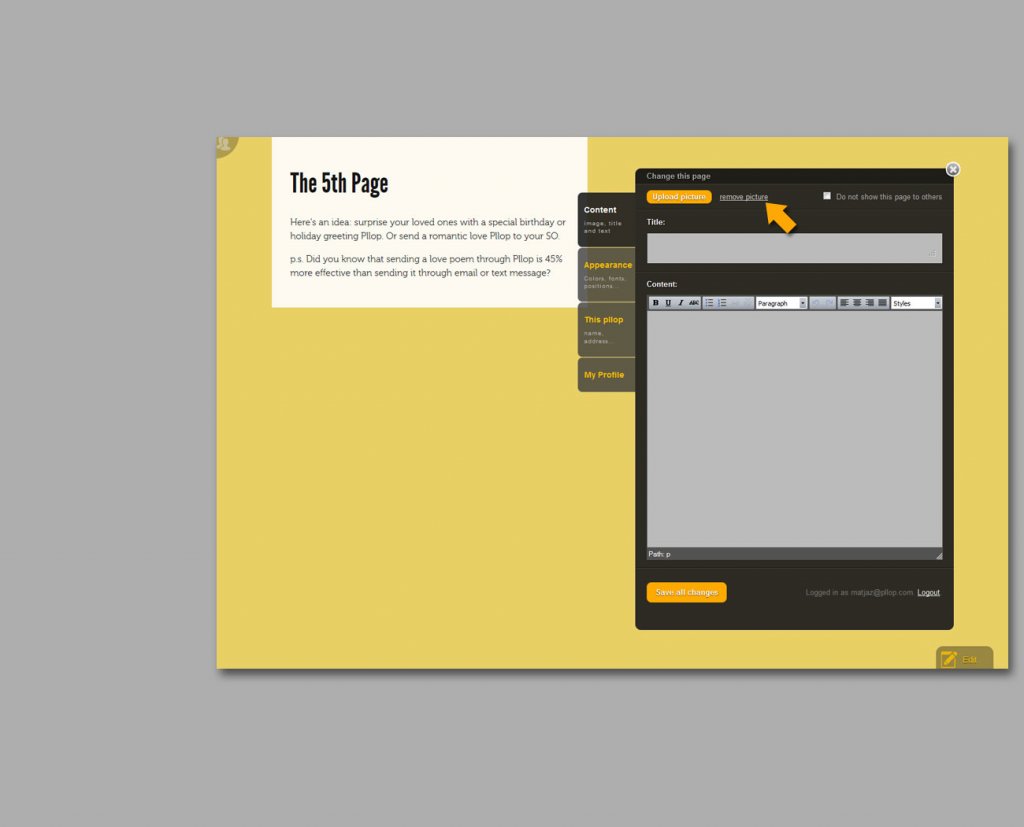
If you don't want to have a photo, open the tab »Content« and click on the »remove picture«. Then set the color of the background in the tab »Appearance« and choose »Image position & Background color«.
Say what's on your mind & make it look awesome
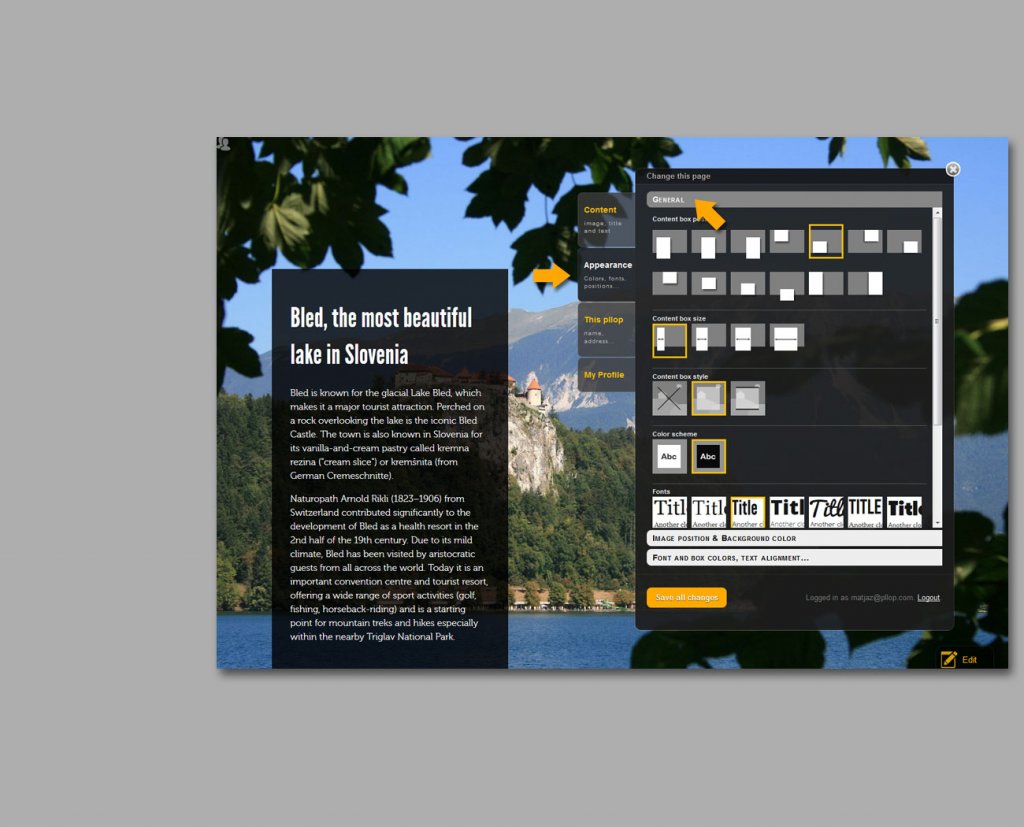
Now is the time to put in the text. In the tab »Content« set the title and the content. In the tab »Appearance« in section »General« change where the box with the content is placed, how big it is, which fonts are used and more.

Text without the box,
photo without the text
If you don’t want to have a content box, but rather to have only the text directly on the photo, or if you don’t want to have the text at all and only have the photo, then open the tab »Appearance”, click on the “General” and choose first “Content box style”.
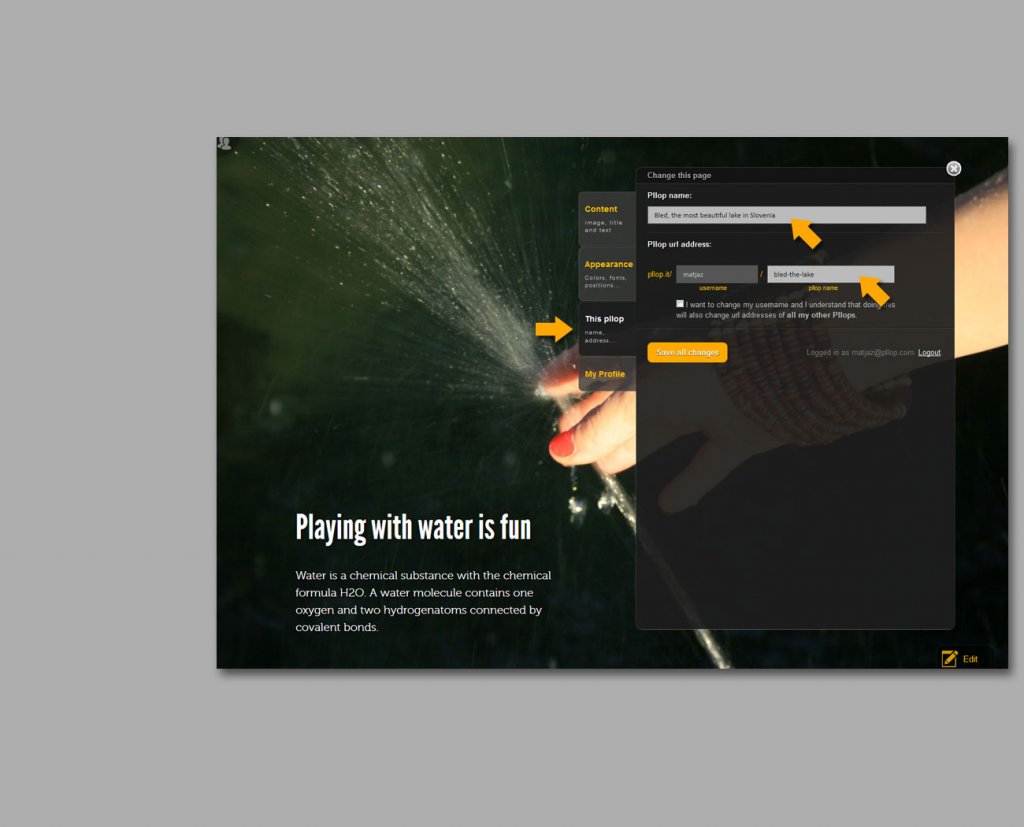
Every pllop needs a name
Name your Pllop by clicking on the tab “This pllop”. There you also set the url address of your new pllop. The url consists of your username and the name of the pllop. You can also change the username, but keep in mind that that will change url addresses of all your pllops and so the old links pointing to your pllops might not work anymore.
Now you just press "Save all changes" button and that’s it! Your wonderful new pllop is created and is ready to be spread around the world.
Want more? Make the text stand out
If you want to play around with colors, styles and fonts you are a true pllop enthusiast and we love you soooooo!
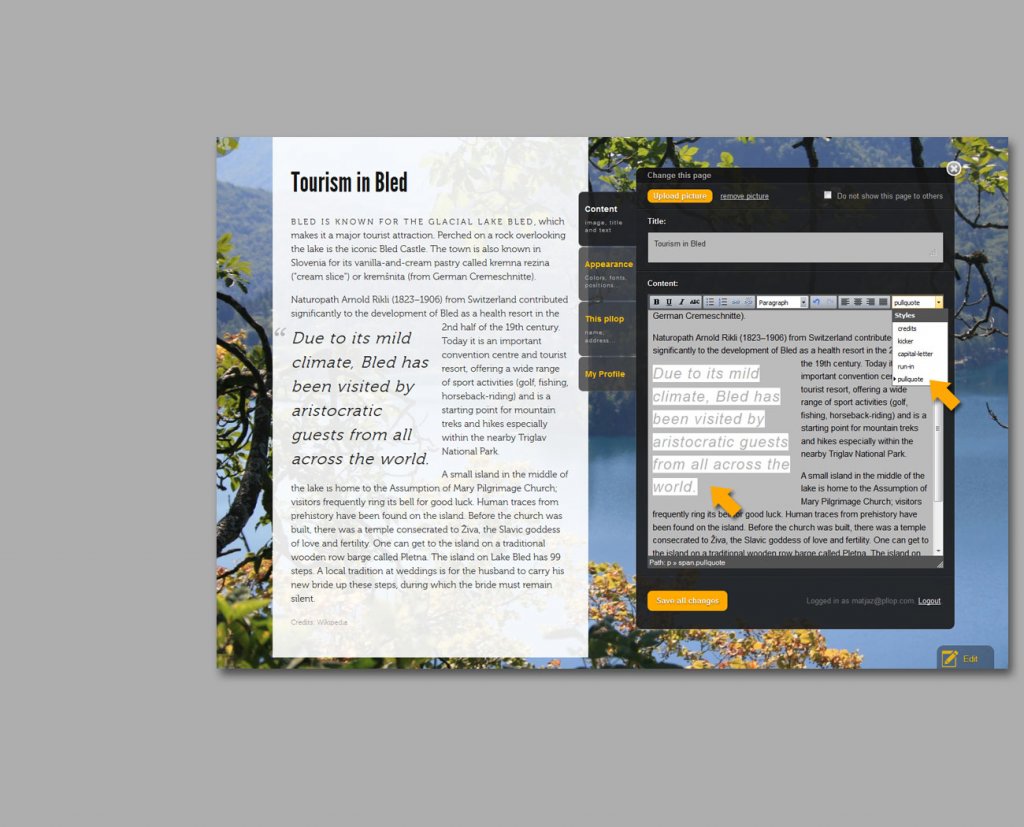
If you want your text to look super cool, click on the tab “Content” and go to Content styles in the right corner of text editor. There you have five wonderful options which will totally spice up your texts and your pllop!
If you are brave customize everything and your pllop will rock... or suck.
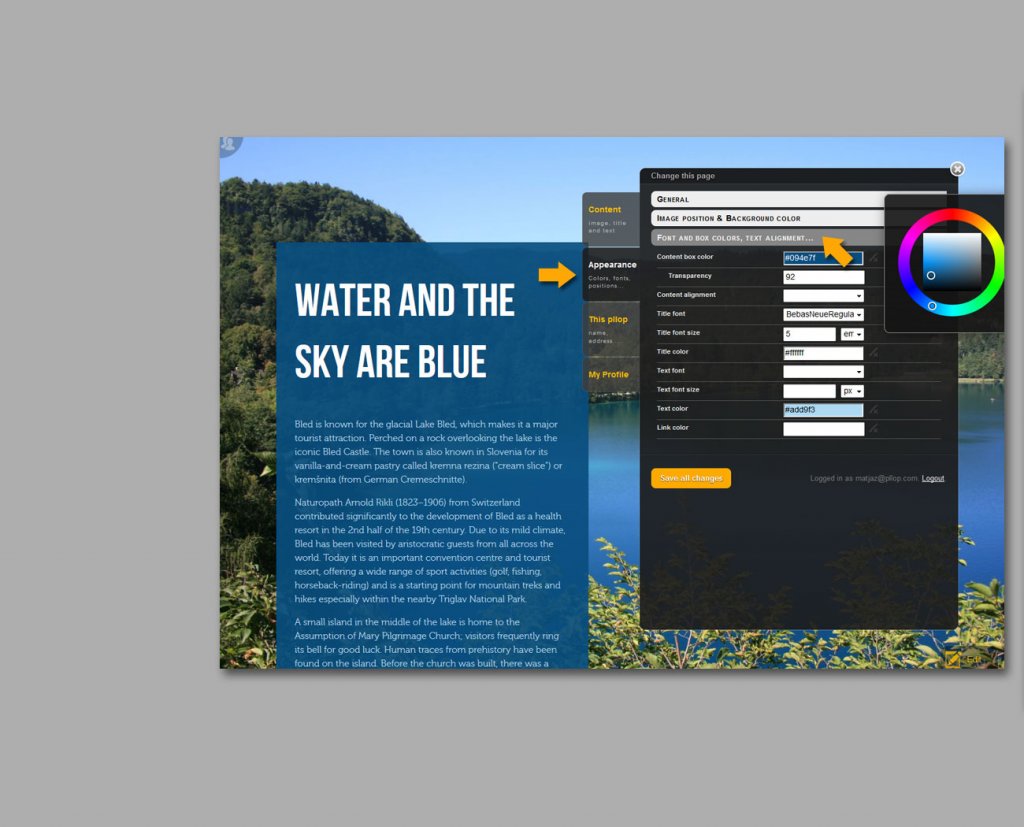
Tab “Appearance” is divided into three sections. We already explained the first two. The third one “Font and box colors” is great for further customizing the look of your pllop. There you can set colors, fonts and font sizes of your links, titles and texts.
Explore and master this tab and the three sections within it and your pllop will rock!
But don't over do it :)
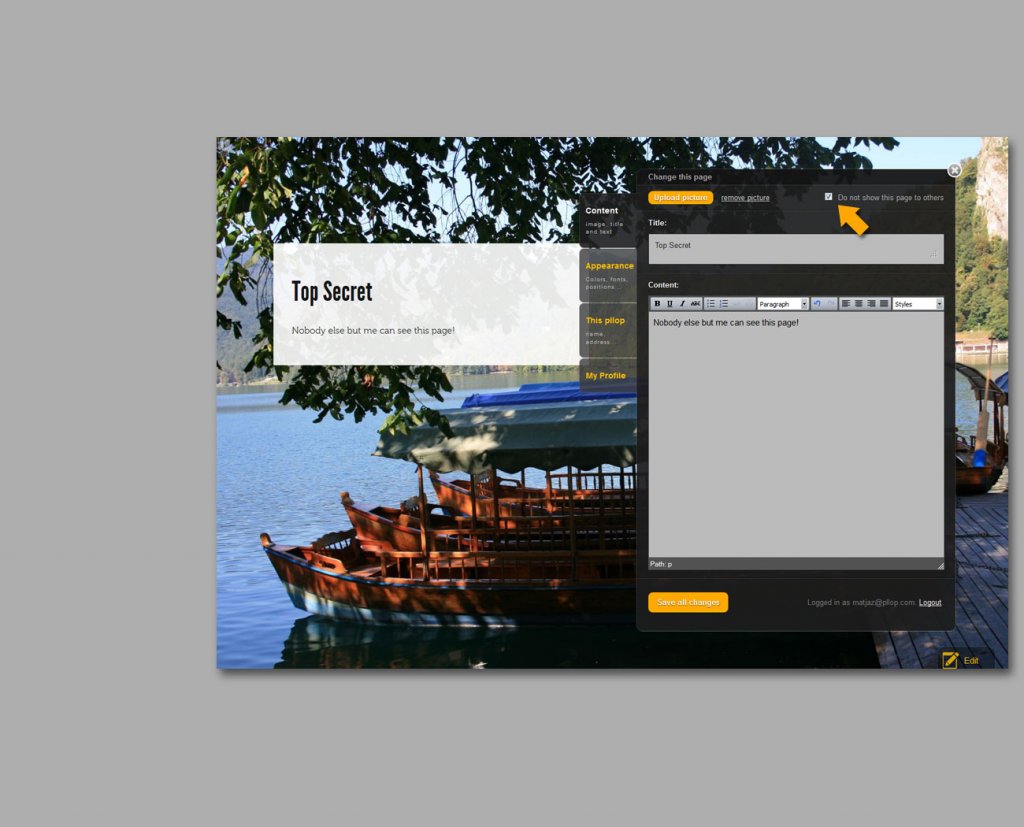
Pllop and the Secret Page
One more thing. Do you want to have secret pages within your pllop that only you can see? To do that, check the “Do not show this page to others” checkbox in the "Content" tab . This is also a great way to hide unused pages or pages you are still working on.